

The DIY Guide: How to Tile a Splashback Like a Pro
Planning to upgrade your kitchen or bathroom splashback? Great choice. It’s one of those small projects that can completely change the look and feel of a space without needing a full renovation. And the best part? You can do it yourself with a bit of planning, patience, and the right tools.
This guide walks through every step of tiling a splashback, from prep to finish, with plenty of practical advice along the way. It’s a satisfying project and a great way to build confidence with DIY tiling.
Why a Splashback?
Before jumping into the how, it’s worth touching on the why. A splashback protects the wall from water, grease, food splashes, and all the daily chaos that tends to happen around sinks and cooktops. But beyond that, it adds texture, colour, and character to a room. It can be bold or subtle, patterned or plain. And when it’s tiled well, it really stands out, for all the right reasons.
So, let’s get into it.
Step 1: Measure and Plan Properly
Don’t skip this. Take your time with the planning stage. Measure the area you’re tiling and then measure it again. Tiling doesn’t leave much room for guesswork, especially around sockets, corners, and edges.
Work out how many tiles you need, and then add 10% more to cover breakages or miscuts. If you’re using a patterned tile, you might need even more to match the layout correctly.
Sketch it out. Literally draw the area to visualise where full tiles will go and where you’ll need to cut. This makes things far easier when it comes to laying them.
Step 2: Prep the Surface
Tiles need a flat, clean surface. If your wall is uneven or has loose plaster, fix that first. Remove any grease, dust, or flaking paint. If it’s a new plaster wall, make sure it’s completely dry. You might need to prime the surface depending on the adhesive you’ll be using. Check the instructions on the adhesive for best results.
If you’re tiling over an existing splashback, remove it first — don’t tile over old tiles. It’s rarely worth it.
Step 3: Dry Lay the Tiles
This isn’t always mentioned, but it makes a difference. Lay the tiles out on a flat surface, the way they’ll go on the wall. This helps you plan where your cuts will go and make adjustments before adhesive gets involved.
You want to avoid tiny slivers of tile at the edges. Try to keep cut tiles at the edges at least half a tile wide if possible. Adjust your centre line to make sure your layout looks balanced from all angles.
Step 4: Start Cutting Tiles
This is where it can get frustrating if you don’t have the right cutter. Accuracy matters. Uneven edges, chips, or breaks will be noticeable, especially in a neat splashback layout.
When you’re cutting multiple tiles for a straight, clean look, a professional-grade tile cutter makes all the difference. Something like the Sigma 4CN Tile Cutter is ideal for this sort of job. It handles porcelain, ceramic, and textured tiles up to 76cm long, and its precision makes diagonal and straight cuts much easier. Plus, it’s got an adjustable base to help absorb impact, so you waste fewer tiles.
Get familiar with your cutter before starting. Practise on a spare tile or two to get the feel of the scoring and snapping action. Once you’ve got the hang of it, it becomes second nature.
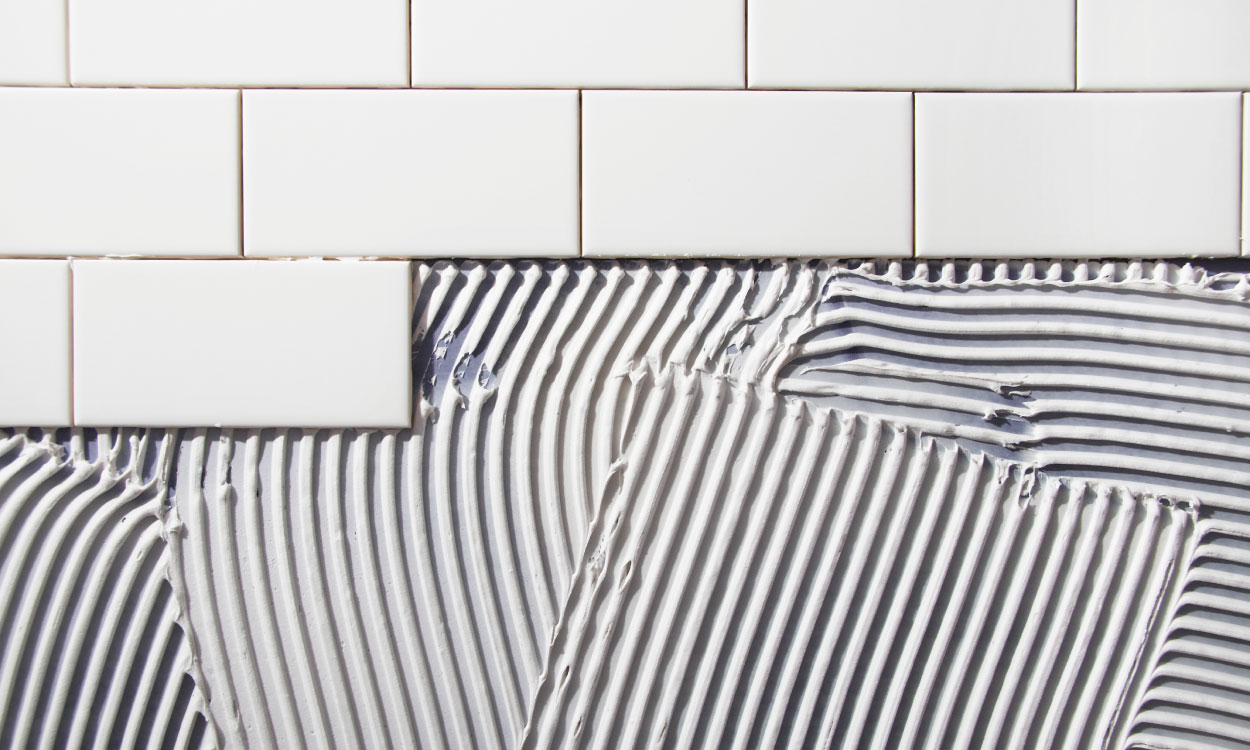
Step 5: Mix and Apply Adhesive
Follow the instructions on your adhesive exactly. Use a notched trowel to apply it to the wall in small sections, starting from the bottom centre and working outwards. Don’t spread too much at once; you want to tile before it skins over.
Press each tile firmly into place with a slight twisting motion. This helps the tile bed into the adhesive evenly.
Use tile spacers to keep your lines neat and consistent. Check every few rows with a spirit level to make sure everything’s staying straight. Once you’ve got a rhythm going, it’s actually quite satisfying.
Step 6: Tackle the Tricky Bits
Cutting around plug sockets or fitting tiles into corners can be fiddly. Measure carefully, double-check, then cut. If a cutout is needed for a socket, mark the outline clearly and take your time with the cutter. For small notches, a tile file or nippers can help tidy things up.
Corners can be finished with trim or mitred tile edges, depending on the look you want. Just make sure they’re level and consistent from top to bottom.
Step 7: Let It Set
Once your tiles are all on the wall, resist the urge to start grouting straight away. Give the adhesive time to dry; at least 24 hours is usually recommended, but check the product guidelines.
Don’t mess with the tiles while they’re setting. They need to stay perfectly still for the best result.
Step 8: Grouting Time
Choose a grout colour that works with your tiles. A contrast can make patterns pop, while a matching tone gives a seamless look. Mix the grout according to the instructions and work it into the gaps using a rubber grout float.
Wipe away the excess with a damp sponge as you go. Don’t wait too long or it’ll start to set on the tile faces. Once it’s dry, buff any haze off with a soft cloth.
For areas around the edges or where tiles meet worktops, use a silicone sealant instead of grout. It’s flexible, so it won’t crack as things naturally expand and contract.
Step 9: Step Back and Admire
Once the grout is dry and the haze is gone, the difference is instant. That splashback will look sharper, cleaner, and more polished. It’s one of those projects that really makes a room feel more finished, and knowing you did it yourself just makes it better.
Don’t forget to clean up your tools properly. Adhesive and grout can ruin them if left too long.
What Makes It Worth It
Tiling a splashback isn’t just about how it looks, although that’s a big part. It’s about adding value to your home, learning new skills, and getting hands-on with something that makes a difference.
It’s manageable, even for beginners. And with a bit of care and the right cutter, you’ll end up with something you can genuinely be proud of.
