

Can You Paint Lead Flashing?
When it comes to home improvement, even the smallest details can make a big impact. One such detail is lead flashing. While it serves a critical role in waterproofing your roofs, windows and chimneys, many homeowners find its dull, grey appearance unappealing. This can get worse, as when it stains, it can change into a white, chalky surface.
With this in mind, many people have a common question in mind – can you paint lead flashing? In this blog, we’ll answer this question as well as outline how you can improve the look of this important part of every property.
Read on for more…
What Is Lead Flashing?
Lead flashing is a strip of lead sheet that is used to construct important water-tight seals in areas prone to water penetration. It is particularly common in the following areas of a property:
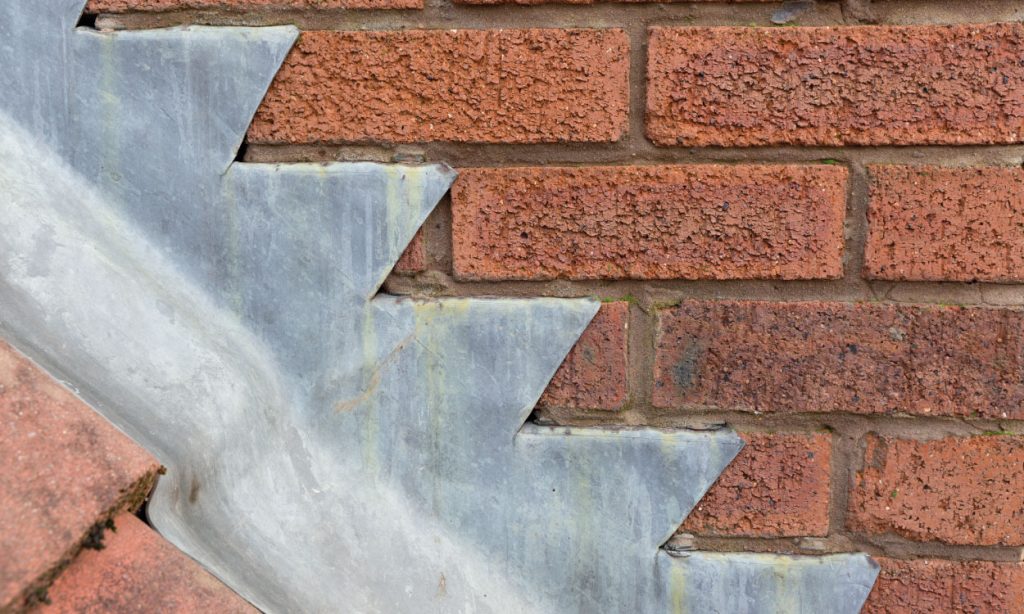
- Where the roof meets the wall: Such as in a side extension or dormer
- Around chimneys: Both at the base and where the stack meets the roof
- Above windows or doors: This is mainly common on older buildings
- Roof valleys: This is the part where the two roof slopes meet
Lead is used for this as it is durable, flexible and resistant to erosion. These properties make it the perfect material for weatherproofing vulnerable areas in a building’s structure. Furthermore, if correctly installed, lead flashing can last well over 100 years. With this in mind, it is no surprise that it remains a trusted building material in the UK.
However, while lead flashing is extremely practical, its appearance can be less than appealing, especially as it ages. Exposure to the elements can lead to the development of an unpleasant whitish-grey streak that can transfer to the brickwork and leave stains. This is why many homeowners look to improve their appearance, and the idea of painting.
Can You Paint Lead Flashing?
Technically, yes, you can paint lead flashing. However, it is not recommended for a variety of reasons. This includes:
- Paint does not adhere well to lead: The surface of lead is smooth and non-porous, which makes it difficult to paint. The paint will not bond correctly to the lead, even if you use primers. This means the paint will often peel or flake off over time.
- It can trap moisture: One of the worst things that can happen when attempting to paint lead is that moisture is trapped beneath the layer of paint. This can accelerate corrosion and reduce the life expectancy of the flashing.
- It may void guarantees: Most roofing manufacturers or contractors provide guarantees for their work or materials, and painting can actually void these warranties.
- Painting lead can look worse over time: While painting may offer short-term improvement in appearance, it doesn’t tend to age well. As the paint deteriorates, it may even look more unsightly than the natural, unpainted lead.
So, although painting might seem like a quick fix, it is not a reliable long-term solution. Fortunately, there is a safe and effective way to enhance the appearance of the lead – and this is where patination oil comes in.
Alternatives To Painting Lead Flashing
Instead of painting, the recommended approach to treating lead is flashing with patination oil. This specially formulated liquid is designed to be applied to new or clean lead, and it helps to prevent the unsightly white stains caused by oxidation and water runoff.
Patination oil enhances the appearance of lead, giving it a cleaner, more uniform finish that protects nearby surfaces like bricks or tiles. It is also easy to apply and doesn’t interfere with the natural ageing of the lead, making it the go-to solution.
What Is Patination Oil?
Patination oil is a light, clear liquid typically made from a blend of white spirit and protective agents. It is specially designed to be used on new or recently cleaned lead to reduce the risk of staining and provide a more attractive finish.
Its benefits include:
- Prevents carbonate staining
- Improves the appearance of flashing
- Extends lifespan
- Easy to apply
How To Apply Patination Oil
Applying patination oil is a relatively straightforward process if you know how. Here is a step-by-step guide:
Clean the lead
Before applying the oil, the lead must be clean and dry. If the flashing is newly installed, it’ll already be clean, and you can get started. If not, use a soft cloth and warm water to wipe down the surface. Make sure it is completely dry before you proceed. You should also make sure the weather is dry before you start and no rain is forecast for at least 24 hours. Moisture can interfere with how the oil bonds to the lead.
Apply the patination oil
Now it’s time to apply the oil. Start by pouring a small amount onto a soft cloth. Wipe it gently over the lead in long, even strokes. A thin layer is all that’s needed, so avoid pooling in an area. You should wear protective gloves as you do this.
Buff the surface
This step is optional, but if desired, you can lightly buff the surface with a clean cloth after a few minutes to achieve a uniform sheen.
Leave to dry
Leave the treated flashing to dry for several hours. Avoid touching it during this time and choose a day when rain is not forecast.
Once the patination oil has been applied, regular maintenance is not usually required. However, every few years, you may want to repeat the process to maintain the great aesthetics the oil offers.
Final Thoughts
While it may be tempting to paint over dull or stained lead flashing, doing so can lead to poor results, including peeling paint, trapped moisture and reduced durability. Instead, using patination oil is undoubtedly the best way to enhance the appearance of your lead flashing. Easy to apply and specifically formulated for use on lead, this oil will also prevent staining and preserve the longevity of your flashing, all without the associated risks of painting.
So, if your flashing is letting down the look of your home, skip the paint and reach for the patination oil.
